Showing posts with label craft. Show all posts

Sunday, 4 February 2007

Yet more confusion

Ah the joy of doing international hobbies.
Below is a table of shorthand instructions for various crochet stitches.
I'm still not sure what the AU half double / US half single is...

Shorthand terms
So Imagine a slipstitch described so: “Pass hook through ch, draw yarn through both sts on hook.”
In shorthand this is described: Insert, pull-thru-2
(as in, insert the hook into ch, and draw yarn through two loops on the hook – the stitch being used for insertion is included as a loop).

Also, where a description might say: “*yarn twice around hook, draw a loop through next ch, draw a loop through first 2 loops on hook, draw a loop through next 2 loops, then another through last 2 loops (thereby competing one long treble st), rep from *” (Patons' Learn to Crochet pamphlet)
In shortcut it would be: Loop twice, insert, pull-thru-2 three times.


Short description of stitchAustralian/EuropeanAmerican
loopyoh (yarn over hook)yo (yarn over)
Insert, pull-thru-2sc/slst (single or slipstitch)?
??hdc (half double crochet)hsc (half single crochet)
Loop, insert, pull-thru-1, pull-thru-3htr (half treble)hdc (half double crochet)
Loop, insert, pull-thru-1, pull thru-2 twicetr (treble) dc (double crochet)
Loop twice, insert, pull-thru-2 thrice!dtr (double treble)tr (treble)
Loop three times, insert, pull-thru-2 four timestrip tr (triple treble)dtr (double treble)
Loop 5 times, insert, pull-thru-2 six timesquintr (quintuple treble)silly


Australian stitch instructions taken from Patons Australia (Patons Australia, Brunswick Vic), except quintr stitch from Craft Moods’ Learn to Crochet (ed. Vicki Moodie, ISBN 1 876383 05 9)
Instructions for US stitches taken from Erika Knight’s Simple Crochet.
Table derived from Margaret Metcalfe's Crochet.com.au Tips.

If you know to fill in the blanks, please comment and do so!

yey!
I did a table!!

Saturday, 29 July 2006

Wee knitting project - Amelia Earhart Aviator Cap


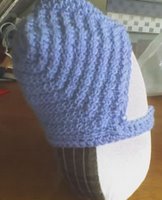
I did this in two evenings of telly with a blue crepe wool - mostlikely an 8ply Cleckheatons. Find the original pattern at Headhuggers.org - its a fantastic site.
In hindsight I suspect I should've used a greater ply, tho I did use the correct needle size I think (4mm?). Anyway, my result, shown below, fits me but looks too small, even with the two lines of crochet around the edges (the chin strap is dble ch). So it will go to my baby niece. :)

My Sister's jumper

I finished it - finally!!! I used this wool to make another junper for her - it was too roomy, had a shallowneck and made her look odd. So we took it apart and I made this one instead (Panda 'Jumper knitted in puffed rib, with crocheted neck edging', in pamphlet 767)

Friday, 21 October 2005

Booties!! Beanies!!


Much to my boyfriend's digust, I'm knitting booties. I have a new niece/nephew (presuming it will be one or the other, not both) coming and using it as an excuse to do quick projects.
The beanie came from a hat book of a workmate and the booties are a variation I made up based on the pirate booties in '50 baby booties to knit' (Zoe Mellor). (I made the cuffs short and crocheted, single, double, triple crochets and then hooked down the side to make triangles along the top).

Sunday, 9 October 2005

Brian's Carlton Guernsey - Part 2


Previously I posted a photo of a vest I made for my nephew, and below is the pattern for it. I will post a scan of the logo grid but this could be used for a regular vest with other logos or colour variations...

Size

6 yo Brian
Measurements: Chest – 60cm,
neck to hip – 37cm, neck to shoulder – 8cm

Need:

Wool: 5ply navy / white in 4 / 1 balls (100g)
Needles: 3mm and 3.25mm

Abbrev:

Stst.. Stocking stitch
CO... Cast on
BO.... Bind off
R...... row
St..... Stitch
W..... work stitches as required to make stst style
Red.. Reduce: -
........ On Perl row: K2tog as required
........ On knit row: slip 1, W1, Slip slipped st over.

Gauge:

15sts x 17rows = 2” sq (or 29sts x 33rows = 10 cm2)

Directions:

BACK

CO 97 stitches.
Single rib for 15mm (approx 6 rows)
Stst for 23cm total.

Armhole:

R1-4: CO3 W to end
R5&6: W
R7&8: W2#, Red1, W to last 4, Red1, W2
R9: W
R10, 12&14: W2, Red2, W to last 5, Red2, W2
R11, 13&15: W
R16: W
R17: W1, Red2, W to last 4, Red1, W2
R18&19: W
R20: W2, Red1, W to last 4, Red1, W2.

Neck & Shoulder:

At 36cm, work to 4 from centre, Red2, W2, place just-worked stiches on holder, place centre stitch of pin or similar, W2, Red2, work to end
R2: W to 5 from end, Red2, W2
R3: W2, Red1, W to end
R4: W to 4 from end, Red 1, W2
R5: W
R6: W to 4 from end, Red1, W2
R7: W2, Red1, W to end
R8: W to 4 from end, Red1, W2
R9: W2, Red1, W to end.
From here, when working away from neck, [W2, Red1], when working away from arm [BO6].

Pick up other side and duplicate.

FRONT

CO 97 stitches.
Single rib for 15mm (approx 6 rows)
Stst for 5cm (6.5cm total).
Begin image.

At 23cm work armhole.

Armhole:

R1-6: CO2, w to end
Odd rows R7: W2, Red1 work to last 4, Red1 W2, rep 5 times (ie, to R15)
R8, 10, 12, 14, 16 & 17: W

AT R14 (after approx 27cm total)

Place centre stitch on holder
START NECK

R20: W2, Red1

Shoulder:

BO6 when knitting towards neck.

Neck:

(R1 on neck is R15 on armhole)
R1, 3 & 5: W2, Red1
Then *W2, Red1*Even Rows till R28 (inc) (i.e. 11 times)
R31: W2, Red1
R35: W2 Red 1

HERE (after approx 27cm)

START SHOULDER

R37: w2, Red1

Sew together at sides and shoulder seams

HEMS

With circular or dble ended needles, pick up no. of stitches as indicated below.
Knit single rib for 15mm (same no. of rows as bottom hem)
Neck: ___ stitches, including those held at the centre of the front and back edges.
Arm: ___ evenly

#Note: at points of reduction, the margin of W2 can be W1 if preferred.


Monday, 29 August 2005

Brian's Carlton Guernsey


I made this jumper for my nephew and was so proud as I had no pattern. I will try to post the pattern soon. It's a size 5.

Saturday, 2 July 2005

Knitting: Wrist Warmers

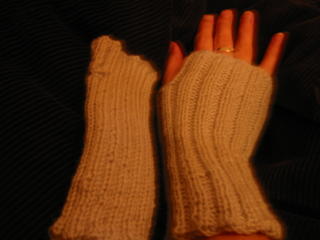
I really like this pattern.
It's a straight forward ribx2, and all you need to know is what kind of tension you do with the kind of wool you have. I got the pattern from the net and altered it slightly for the wool I had lying around so I'm not to sure of the specs: I think this one was about 8 ply mohair (feels like 4ply wool), with 3.25 needles (x4) and about 48 stitches (I think). It was a 6-stitch button hole for the thumb, with nothing else built on it. (This was not a big enough for a man's thumb).
This was my first go at circular knitting with multiple needles and I was pleased with the result. :)

Knitting: Blind Beanie & Scarf


I'm calling this a blind beanie because I really didn't know how it end.
I made the scarf first (waffle stitch), not knowing how far the wool would go. Once I got half way through the beanie I could see the it wouldn't last to the end, so I did a band of waffle stitch to link it to the scarf and then finished it with an pink wool of equal ply.
I also used the pink wool in the fringe. I tried a different style of fringing, rather than the simple loop hold, which required sewing it through. I liked the cross over effect in the end.
For some strange reason, the ribbing on the beanie turned out to be loose, so I sewed the pink wool through the edge in a cross-over style (to link with the fringing) and pulled it tighter. That is a pompom you can see there, hanging off about 4cm of wool (that was to use up the last of the pink wool)...
Its a weird mix in the end because I think the beanie is better suited to a baby, who wouldn't normally wear a scarf. And after all that I wouldn't normally knit anything like this if I didn't have wool to do something with. It does , however, prove that limitations often push your creativity.

Knitting: Beehive Beanie Project

This beehive beanie comes from the Stitch n' Bitch Nation book. It's not a great picture, and would look better on a head, but I didn't have one spare at the time. It's done in 8ply wool and I used what was left to make a band for your neck (I wanted to find a big flower button, but couldn't). There are also few bee buttons on there. Its a very easy pattern: essentially cast on, and with circular needles, purl 4 knit 2 and decrease as for a regular beanie. Obviously there's more to it but I'm not dealing with copyright issues on a blog...